Pivot Fingers
A pivot finger helps your left hand move around the fingerboard, just as a guide finger does. A guide finger will help with shifts but a pivot finger is going to assist complex movements in the same position using multiple fingers. Or to put it simply, it will help moving between chord shapes.
Quite often there will be a common note between two chords. For instance, the C major shape in first position shares the note C (first fret second string) with the D7 Chord. So instead of lifting all the fingers off the fingerboard when moving from the C chord to the D7 chord, you can leave the C note down and ‘pivot’ around that finger. This way you only have to move your 2nd and 3rd fingers, making the whole process easier.
Another nice example is the A minor chord going to the C major chord. These two chords share two notes between them, the C on the second string and the E on the fourth string. So all you need to do is move the third finger, the other two can stay in place. You will quickly see that you are conserving a lot of time and energy by moving in this efficient manner.
The hard part!
The pivot finger technique is fairly simple, what is more important is to find out where these pivots happen in the repertoire. This is one of the many examples where you will accomplish more if you put the guitar aside and analyze the score on its own. Go through each passage, and look for any pivot fingers that might make passage more secure or fluid. Students are often surprised when I point out pivot fingers; it really makes playing the guitar a lot easier.
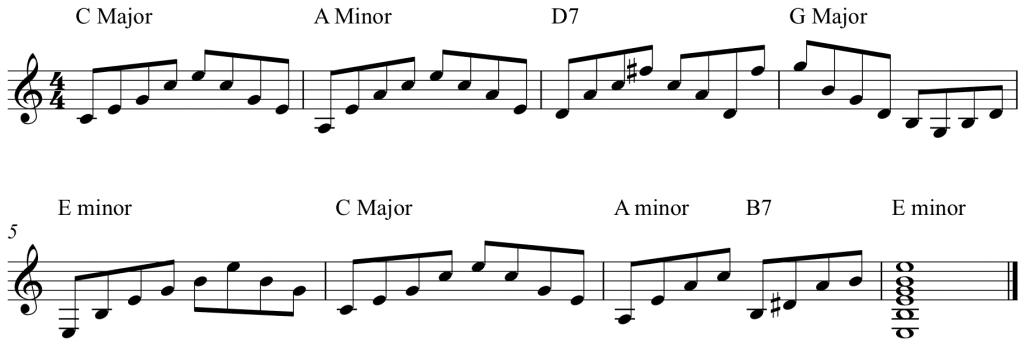
Have a go at this passage, how many pivots can you find?
Hint: there are pivot fingers that connect all chords except D7 to G Major where you can use a guide finger.
To study this technique in-depth you can take the comprehensive Technique & Musicianship Course Level 2 in our membership packages! Over 3 hours of video and more than 20 worksheet downloads will guide you through a structured and focused course of study.


Leave A Comment