Left Hand Accuracy and Positioning
In this article we’ll look at left hand accuracy and positioning.
If you have ever had challenges getting your left hand to stay in position or get your fourth finger to remain close to the fingerboard, this exercise will likely be helpful. It is simple in concept but very effective at developing good habits in your left hand technique.
As a teacher this exercise has proven very useful to demonstrate a student’s left hand position. My hope is that by sharing this lesson it will be of use to those who are learning without a teacher also.
If you have your own variations on this exercise please share them in the comments.
If you have trouble getting your 3rd and 4th fingers in the left hand to behave, accurately placing your fingertips at the fret, or maintaining the left hand position… you are not alone.
I am going to provide you with some useful exercises to improve your left hand technique, but first let’s talk about the key issues.
Left hand finger placement
If you develop the habit of good finger placement in your left hand, you are going to make everything else easier.
Accurate finger placement helps produce a clear sound, it uses less energy, relieves tension, aids agility, and it will encourage consistency with other movements in your left hand. These compelling reasons make it well worth your time to focus on left hand finger placement as a priority in your practice session.
Over the years I have come across many beginner and intermediate students that say they “can’t” make the stretch, or their fingers simply “won’t” reach that far. This is simply not true.
While we all have different shapes and sizes, and even peculiarities from person to person I have never come across anyone who cannot develop reach, flexibility and accuracy with dedicated and focused practice. Developing a habit takes time, and so does developing flexibility within your hands. Remember that we are dealing with ligaments and tendons in our hand, not just muscles, and they take a considerably longer time to adapt.
Perhaps an experience that we have all shared is figuring out how to play the first position G Major chord. This basic chord involves a stretch from the sixth string to the first and for all of those who encounter it for the first time it seems difficult if not impossible. Did you manage to make the distance with some perseverance?
The number one culprit that might be holding you back is a lack of consistency in your finger placement and this is down to your attention to detail. If you are unaware that your fingers are placed too far back in the fret, then you won’t be able to make a change for the better.
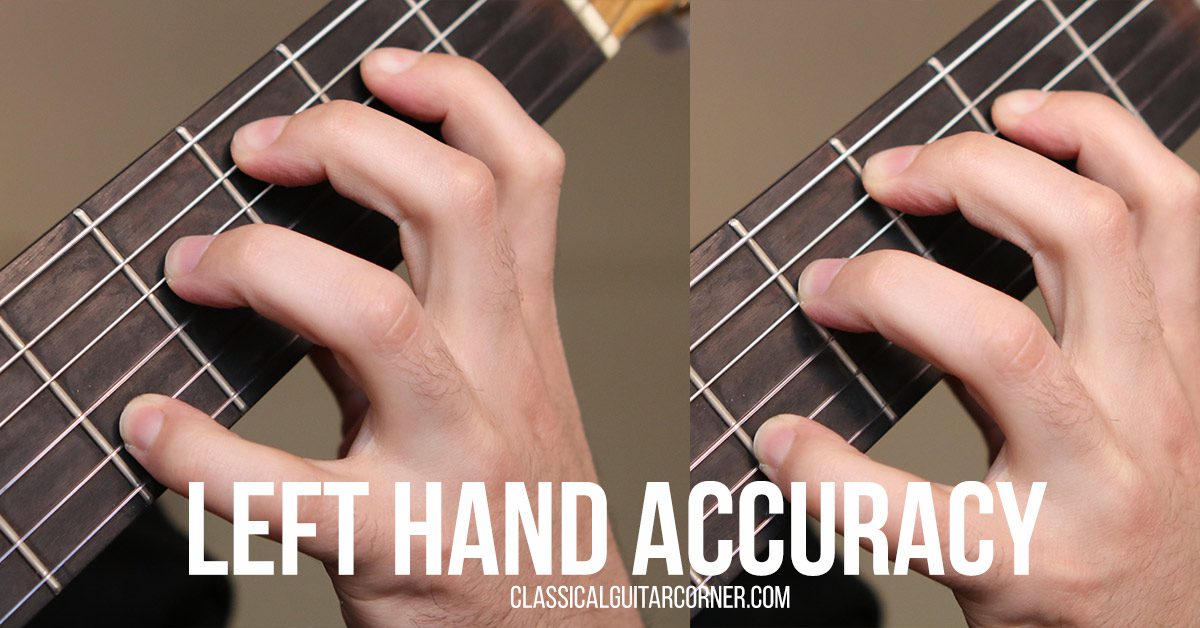
Have a look at the following examples, record a quick excerpt of your left hand playing and evaluate whether or not there is room for improvement.
Some exceptions to bear in mind
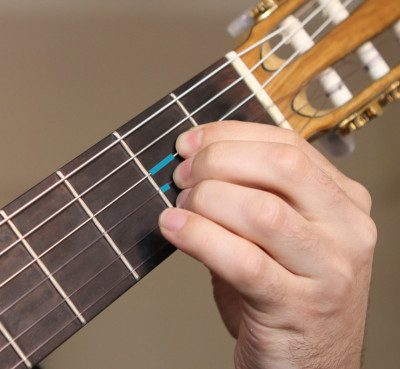 To be clear, there are many instances where the fingertips cannot always be neatly placed up against the fret wire. A good example of this is the common A Major chord that squashes three fingers onto one fret. There is no need for each fingertip to be exactly snug against the fret in this case. There are plenty of other examples of this being the case too, but in general we should be striving for a consistent closeness to the fret.
Exercises to improve your finger placement
The first step, as was mentioned earlier, is to be aware if you are placing your left hand fingers accurately or not. So, record your left hand playing a variety of material and have a look. Record for long enough that you fall back into your regular playing style, not one that is hyper aware of being analyzed.
After having a look you might notice that your finger placement becomes inconsistent with specific movements. For example, it might be that when you shift your left hand position, the finger lands without consistency. Or, it might be that when more than one finger is used at the same time results get messy.
See if you can identify some specific reasons that it is happening.
If your overall finger placement is sloppy it will be important to take a very simple exercise to start building accuracy and consistency.
For this I recommend playing a very simple sequence of fingerings in the seventh position. This involves the left hand playing finger 1, 2, 3, 4, sequentially on one string then moving the the adjacent string. It looks like a chromatic scale, but it isn’t as we are playing in the seventh position.
Why the seventh position? Because the frets are closer together and it is more conducive to the majority of hands.
(play this sequence in reverse once you reach the first string so you head back towards the sixth string)
As you work through this basic but effective exercise focus on each finger being placed snug up against the fret each time, using the same small pad of your fingertip each time and keeping the fingers down as you play 1 – 2 -3 -4.
After you have spent fifteen minutes on this, you can give yourself a rest (yes try and spend a full focused fifteen minutes!). When you return to the exercise, perhaps that day perhaps the next, you can move it down to the sixth position. Over the span of a couple of weeks move it down to first position and your left hand will have enjoyed and progressive habit building exercise that encourages accuracy and flexibility.
Following on from this exercise, you can move to a full chromatic scale in the first position that then shifts up on the first string towards the twelfth fret.
Hitting Adjacent Strings
Accuracy with the left hand is an essential part of classical guitar technique. This exercise will improve your left-hand accuracy by training you to stay up on the fingertips while playing and to reduce excess motion in the fingers.
Download the accompanying exercise to play along:
CGC Left Hand Accuracy Exercise
Scale Practice
Focusing on accuracy of finger placement is a perfect example of how we can use scales as tools to develop our technique.
Regular scales that have one single note after another provide the challenge of every single note having accurate and consistent finger placement. We can also start to think about the consistency of weight/finger pressure we use.
A scale in one position is great for the variety of finger combinations it uses and a scale that shifts around the fingerboard will give us a chance to work on shifting, extensions and contractions.
The key of the scale does not matter too much in this process but choosing a variety of locations on the fingerboard and a variety of scales (which therein have a variety of fingerings) will be a comprehensive way to approach your accuracy.
A two octave scale with accompanying arpeggio will give you a variety of challenges with which to monitor and improve your accuracy.
Scales in thirds, sixths, octaves and tenths
These scales require you to play two notes at a time, so our challenge of accuracy and consistency is greatly increased. I would recommend staying on single note scales until you can see that you are very accurate and consistent in your left hand recordings.
The goals will be the same in terms of finger placement and shifting but your finger independence will now get a substantial workout.
These two scales provide a compact area to work on your accuracy, albeit in in the first position where the stretches are the greatest.
Over a two octave scale we get the opportunity to shift, and traverse the fingerboard which includes a variety of distances between frets. A great exercise!
Take all of these exercises at a slow tempo, perhaps quarter note equals 50 or slower. Why? Because if you you set a fast tempo you will not be able to notice or correct your finger position. Use a metronome to keep you on track, and remember that speed is not a goal here just accuracy and consistency.
If you want access to all of the exercises, scales, and demonstration videos that build left hand technique, you can become a member and get instant access.





I love how this was described. Honestly, this is the first place I have seen it explained to start this exercise higher up on the fret board to ease into the stretching. I am looking forward to trying this out in my next practice!
LEFT HAND ACCURACY. In your examples, what do the tiny numbers above the staff mean, and also the numbers below that are in circles?
Tiny numbers above the staff refer to which left hand finger is to be used to play that note. The circled numbers designate on which sting to play that note.
Which finger is “0” ?
Sorry, Never mind. I thought there were “0” ‘s used in higher positions, but now I see that is not the case, only in First position. Obviously, in first position, a “0” is the open string.
I’ve been warming up with the Segovia scales (all of them – major and minor) for several years now, very slowly – for this very purpose – to focus on left hand accuracy. I struggle with a very uncooperative left hand pinky, and scales serve to help it know who’s boss.
Thank you for these exercises – the reasoning for them is useful and the description is very clear and helpful. A concern, though, is how to do the exercise with the right hand. If this is not known then a lot of time could be spent learning incorrect technique to the detriment of future playing.
I like how you’ve approached this practice at the 7th position; we all (beginners) need more experience in upper positions. I found a small inexpensive book that also helps me, viz., “Fingernastics” (a therapeutic exercise book for hands) by Dr. L.R. Quercia & Anthony Crescione. I would enjoy reading your opinion on this book.
Simon, I’ve printed out these exercises and have been practicing them this evening. They’re great! Thank you so much!
Simon,
I study classical guitar as an amateur. I have 74 years. Lately my left hand trembles when I play. It would be essential tremor and loss of muscle mass in the arm. Can you tell me anything about it?
sir, with regard to hand stretch and flexibility i hope what you said will be true to me. Even now i cannot reach properly one chord i encountered in the piece by beethoven transcibed by tarrega ie adagio cantible. It spans from the sixth string 2nd fret Fsharp to the first string 7th fret! Is there a slight hope that i may someday be able to do it? I love the piece so much. Or is it a physical limitatiom that cannot be solved?
Is stretching exercises like this a good thing or rather bad?
https://www.youtube.com/watch?v=TSrfB7JIzxY
Hi Kevin,
Yes, I think stretching before playing is useful and important. The only thing I would add is a few words of caution:
1. Be sure to breathe just like you would stretching any other muscles—very important to get oxygen to your muscles while you stretch them.
2. Most importantly: don’t overdo it. Don’t stretch to hard, too fast, or for too long. You will continue “stretching” your muscles as you warm up on the guitar.
3. The commentator is right that stretching is something you should “feel,” but do not push your muscles to the point that you feel pain (tips number 1 and 2 will help with that). Any pain at all and stop. (Good tip for while you’re practicing as well.)
It’s really easy to injure yourself if you overextend your muscles, so be sure NOT to overdo it. (sorry, guess I repeated no. 2 twice!).
Peace,
Dave B (CGC team)
Pure gold. These exercises woven into my daily practice routine have probably done more good than anything I can recall for a while. Slow, focused practice like Simon recommends is disorienting at first (or was for me) but once past that the pace allows you to really concentrate on how the LH fingers go down. If you haven’t already tried these exercises, or have and gave up because they’re a little gruelling to begin with, IMO they really are worth persevering with. My thanks to all involved.
I should also mention I found a real RH benefit from them too even though that’s not mentioned here. The slow pace gives a chance to choose the RH stroke too.
Hi Simon,
It is really work and feeling better by doing this exercise before start playing guitar.
Thanks for sharing.
This info is precisely why I invested in becoming an annual member :)
I am blocked from starting the “1 Octave Scale in Thirds” exercise. I can’t figure out how to play the C and the E notes on string 5, using fingers 1 and 2. Also, if both notes are on the same string, how to play them both at the same time? Is there a video demonstration of this?
Hi Art,
The string number there only refers to the lower note, the C—you play the E on the fourth string. When the string number changes the higher note will always be one string above. Thus, the E on the fourth string is paired with its third, the G, on the third string. I hope this clears things up, but let me know if you have any other questions!
Peace,
Dave B (CGC team)
This looks great. I have been feeling like sounding a note correctly was a matter of chance and luck. Not the feeling I want. Like VinceMac62, I find slow and focused practice very disorienting. But today I noticed that if I go slow enough I can hear the changes in a notes’ tone as I make even the smallest change in the pressure and position of my fretting finger. That is great feedback for learning. I am encouraged!
Dave and Simon,
This is great since I am having problems with my fingers on the fretboard.
Thank you for all great instructions in learning to play.
Will